Appearance
Node Editor User Guide
The Node Editor (/node-editor) is Coldwave's visual programming workspace. You build processing pipelines by dragging nodes onto a canvas and wiring them together — each node performs one step (read a value, compare, compute, accumulate, emit a result), and the connections decide how data flows from input to output.
The Node Editor is aimed at administrators and power users. If you can't see it in the navigation, your role doesn't grant the necessary permissions.
Contents
- What pipelines are for
- Page layout
- The node palette
- Working with nodes
- Working with connections
- The inspector
- Canvas controls — zoom, pan, layout
- Instances panel
- Drafts and publishing
- Deep links
- Persistence — what is remembered
1. What pipelines are for
A pipeline is a small program that runs on Coldwave's backend. Typical uses:
- Derived values — compute a value from one or more raw device properties (e.g. power = voltage × current).
- Aggregations — roll up readings across time or across devices.
- Filters and routing — only let through values that match a condition; send results to different downstream consumers.
- Custom logic — anything domain-specific you want to express graphically rather than in code.
Each pipeline is identified by a config identifier and can be opened, edited and re-published independently.
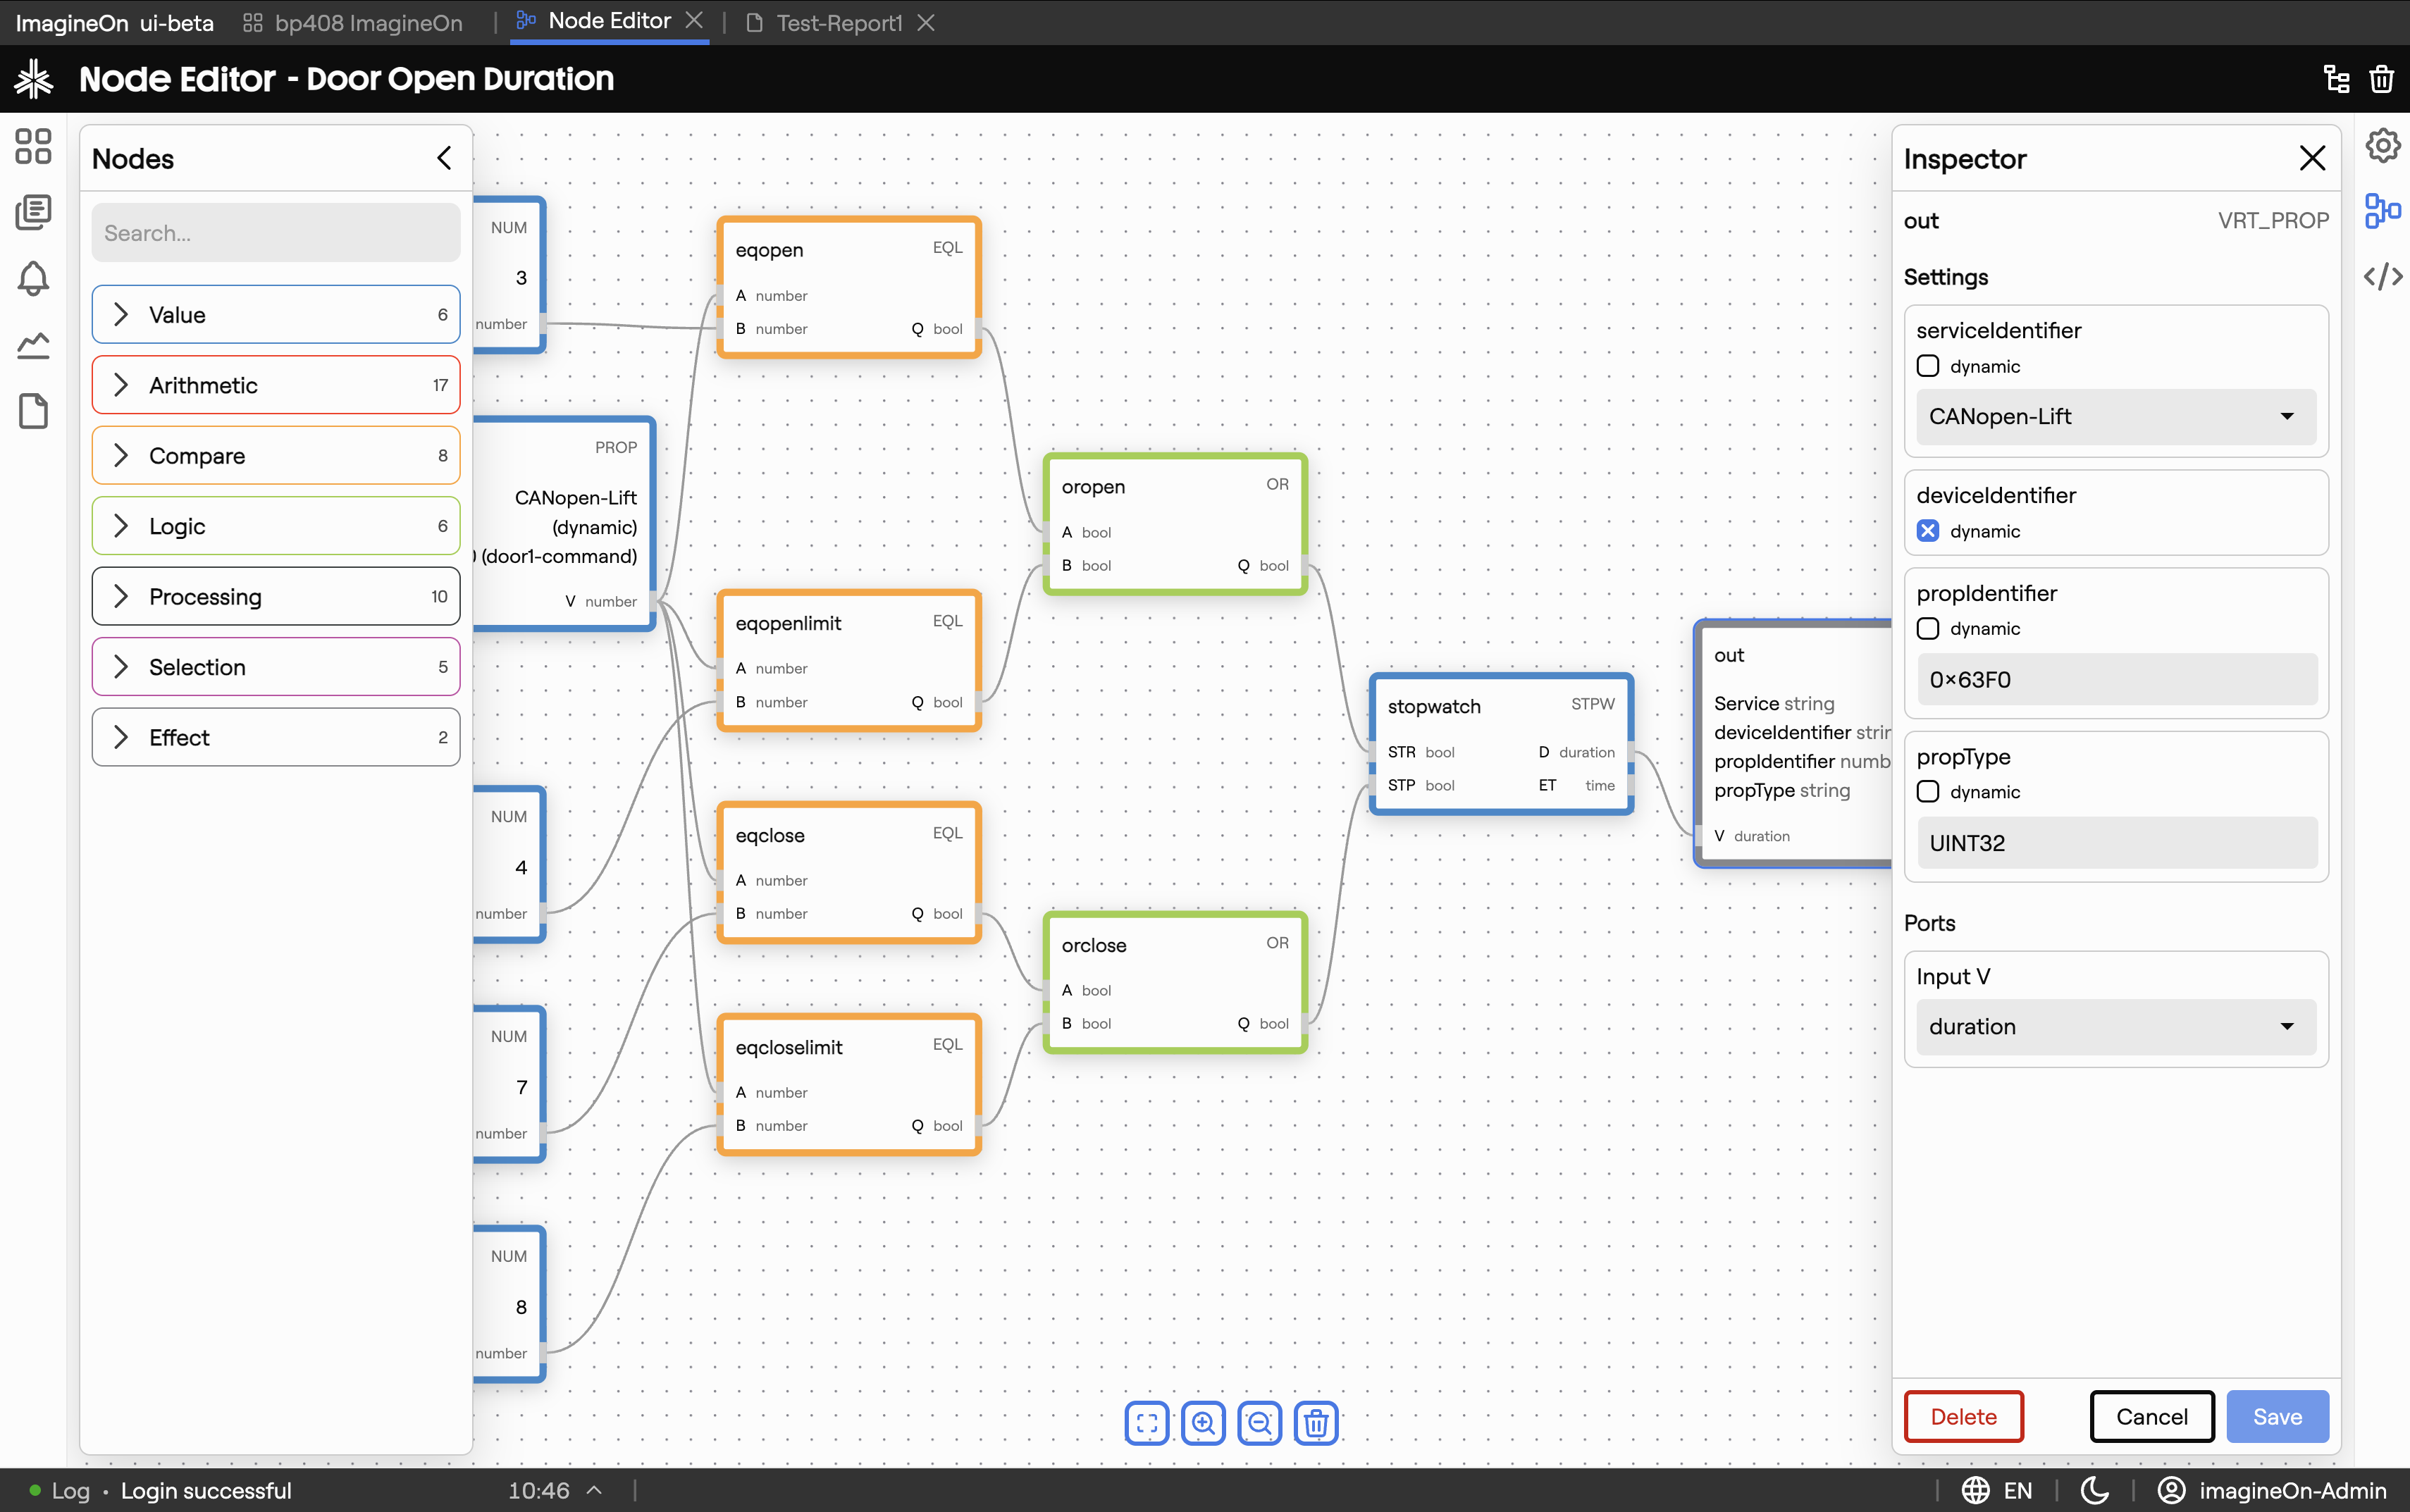
2. Page layout
The Node Editor fills the page with a large canvas, surrounded by floating panels.
| Area | What lives there |
|---|---|
| Canvas | The central workspace where nodes and connections live. |
| Palette | Left-hand panel listing node templates you can drag onto the canvas. See §3. |
| Inspector | Right-hand panel showing the selected node's parameters. See §6. |
| Controls | Floating button cluster with zoom in / out / fit / auto-layout. See §7. |
| Instances panel | Toggleable strip showing pipeline instances and their runtime state. See §8. |
| Toolbar | Save and Publish actions. See §9. |
A new, empty pipeline starts with just a Result node placed in the middle of the canvas.
3. The node palette
The palette groups node templates by purpose:
| Template | What it does |
|---|---|
| Value | Reads a device property and emits its value into the pipeline. |
| Logic | Boolean operators — AND, OR, NOT. |
| Compute | Arithmetic and comparison — +, −, ×, ÷, >, <, =, etc. |
| Accumulate | Aggregations across time or across inputs — sum, average, min, max, count. |
| Result | Terminal node. Whatever flows into it is the pipeline's output. |
Hover a template for a short description. Drag it from the palette and drop it onto the canvas to add a new node.
4. Working with nodes
Each node has:
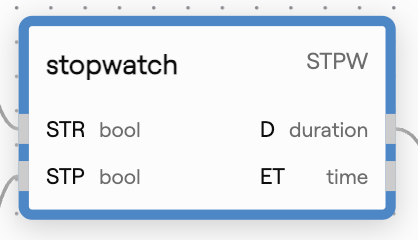
- A title bar with the node type and a small drag handle.
- Input handles on the left (none on Value nodes).
- Output handles on the right (none on Result).
- A body with type-specific parameters (or a read-only summary if the parameters are edited in the inspector).
Gestures
| Gesture | Effect |
|---|---|
| Drag a template from the palette onto the canvas | Add a new node. |
| Click a node | Select it; its parameters appear in the inspector. |
| Drag a node by its title bar | Move it on the canvas. Other nodes don't shift — placement is free-form. |
| Shift-click several nodes | Multi-select; you can then move them together. |
| Delete key | Remove the selected node(s). Connected edges are removed too. |
| Right-click a node | Open a context menu (duplicate, copy ID, delete). |
Auto-layout. Use the Auto-layout button in the controls if the canvas gets messy — Coldwave rearranges nodes hierarchically from inputs (left) to result (right) and re-routes connections.
5. Working with connections
Connections (also called edges) carry values from one node's output to another node's input.
- Create — drag from an output handle to an input handle. The connection snaps when you release on a compatible handle.
- Types — handle colour hints at the data type (number, bool, etc.). Coldwave prevents incompatible connections.
- Select — click an edge to highlight it.
- Delete — select an edge and press Delete, or hover and click the × that appears mid-edge.
- Re-route — drag the loose end of an edge to a different handle to re-attach it.
If a node has an unsatisfied required input, it's marked with a small warning badge and the pipeline won't validate on save.
6. The inspector
The right-hand inspector shows the parameters of whichever node you've selected.
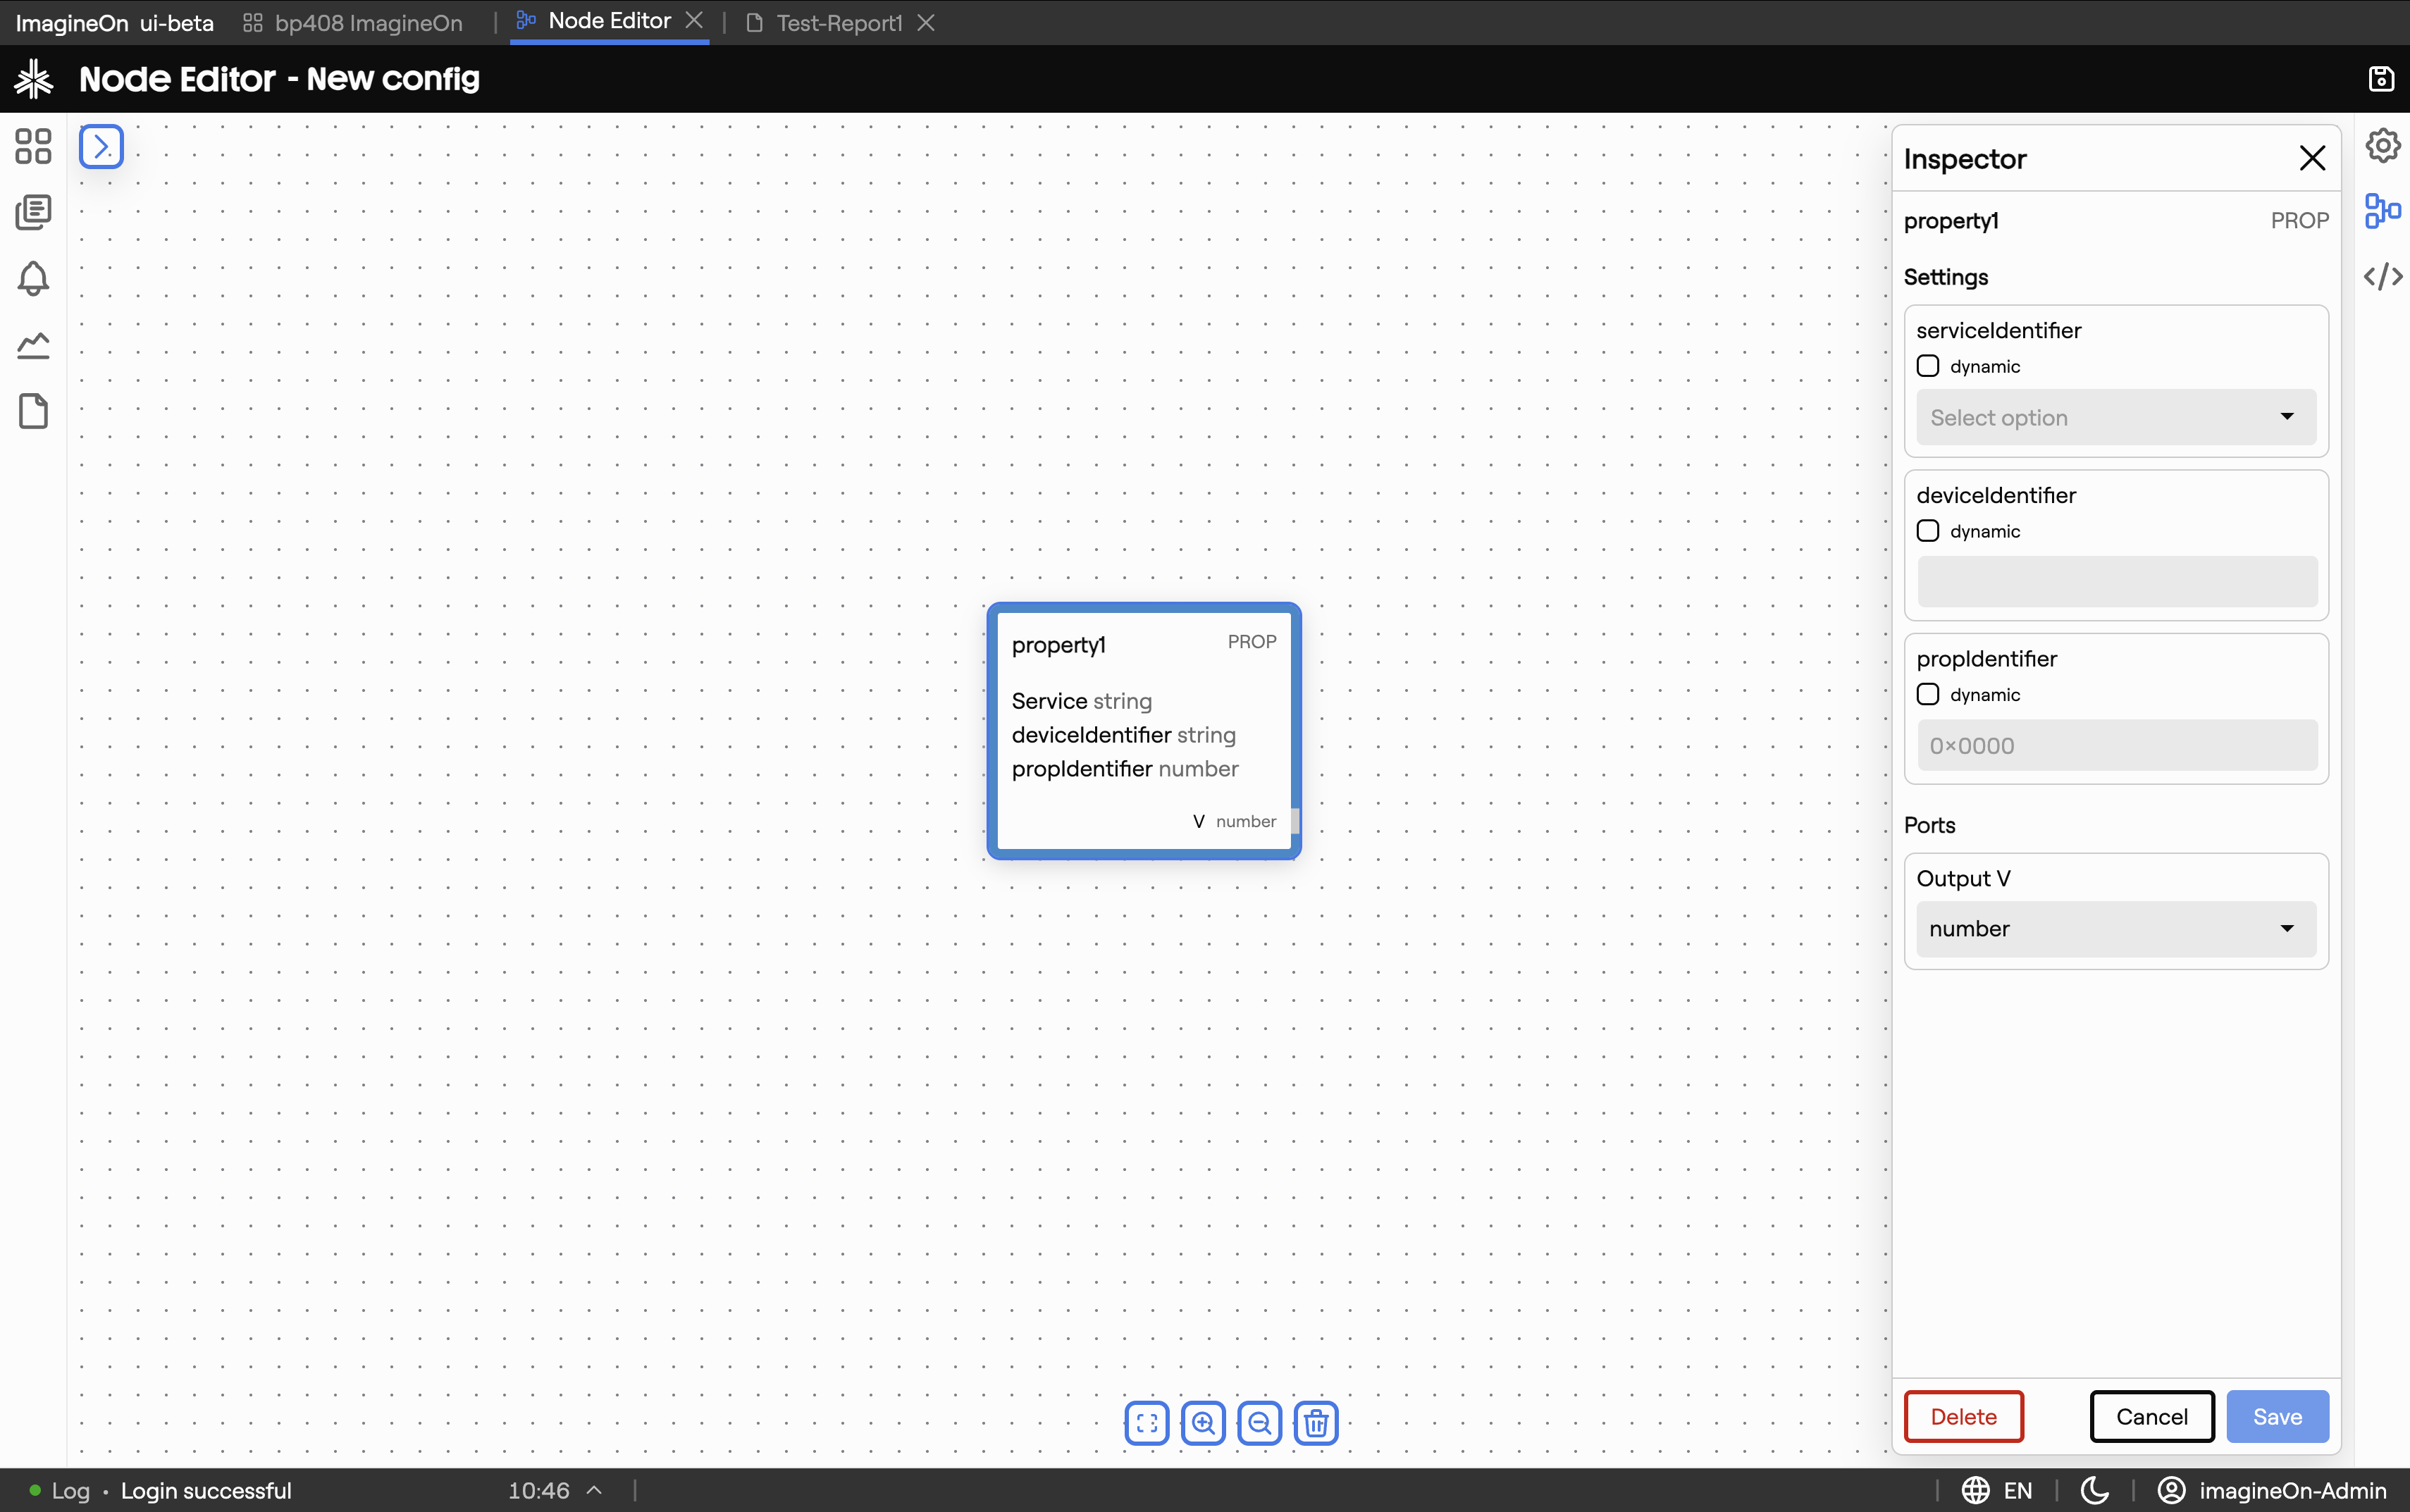
Examples of what you'll see there:
- Value node — pick a device and a property; optional default value if the property is missing.
- Compute node — choose the operator (
+,−,×, …) and any constants. - Accumulate node — pick the aggregation (sum / avg / …) and the window (e.g. last 5 minutes, last 100 samples).
- Result node — name and metadata for the pipeline's output.
Changes apply live to the node on the canvas; you don't need to confirm individual edits. The pipeline as a whole is saved with the toolbar's Save button — see §9.
7. Canvas controls — zoom, pan, layout
A floating control cluster (usually bottom-right) gives you camera controls:
| Button | Effect |
|---|---|
| Zoom in / out | Scale the canvas. |
| Fit view | Zoom out far enough to see every node at once. |
| Auto-layout | Re-arrange nodes hierarchically. |
Mouse and keyboard equivalents:
- Scroll wheel — zoom in / out around the cursor.
- Drag empty canvas — pan.
- Space + drag — pan with the keyboard modifier (useful when nodes are dense).
8. Instances panel
A pipeline can have multiple running instances — for example one per device the pipeline applies to. The instances panel (toggle it from the toolbar) lists every running instance with its current state and last result.
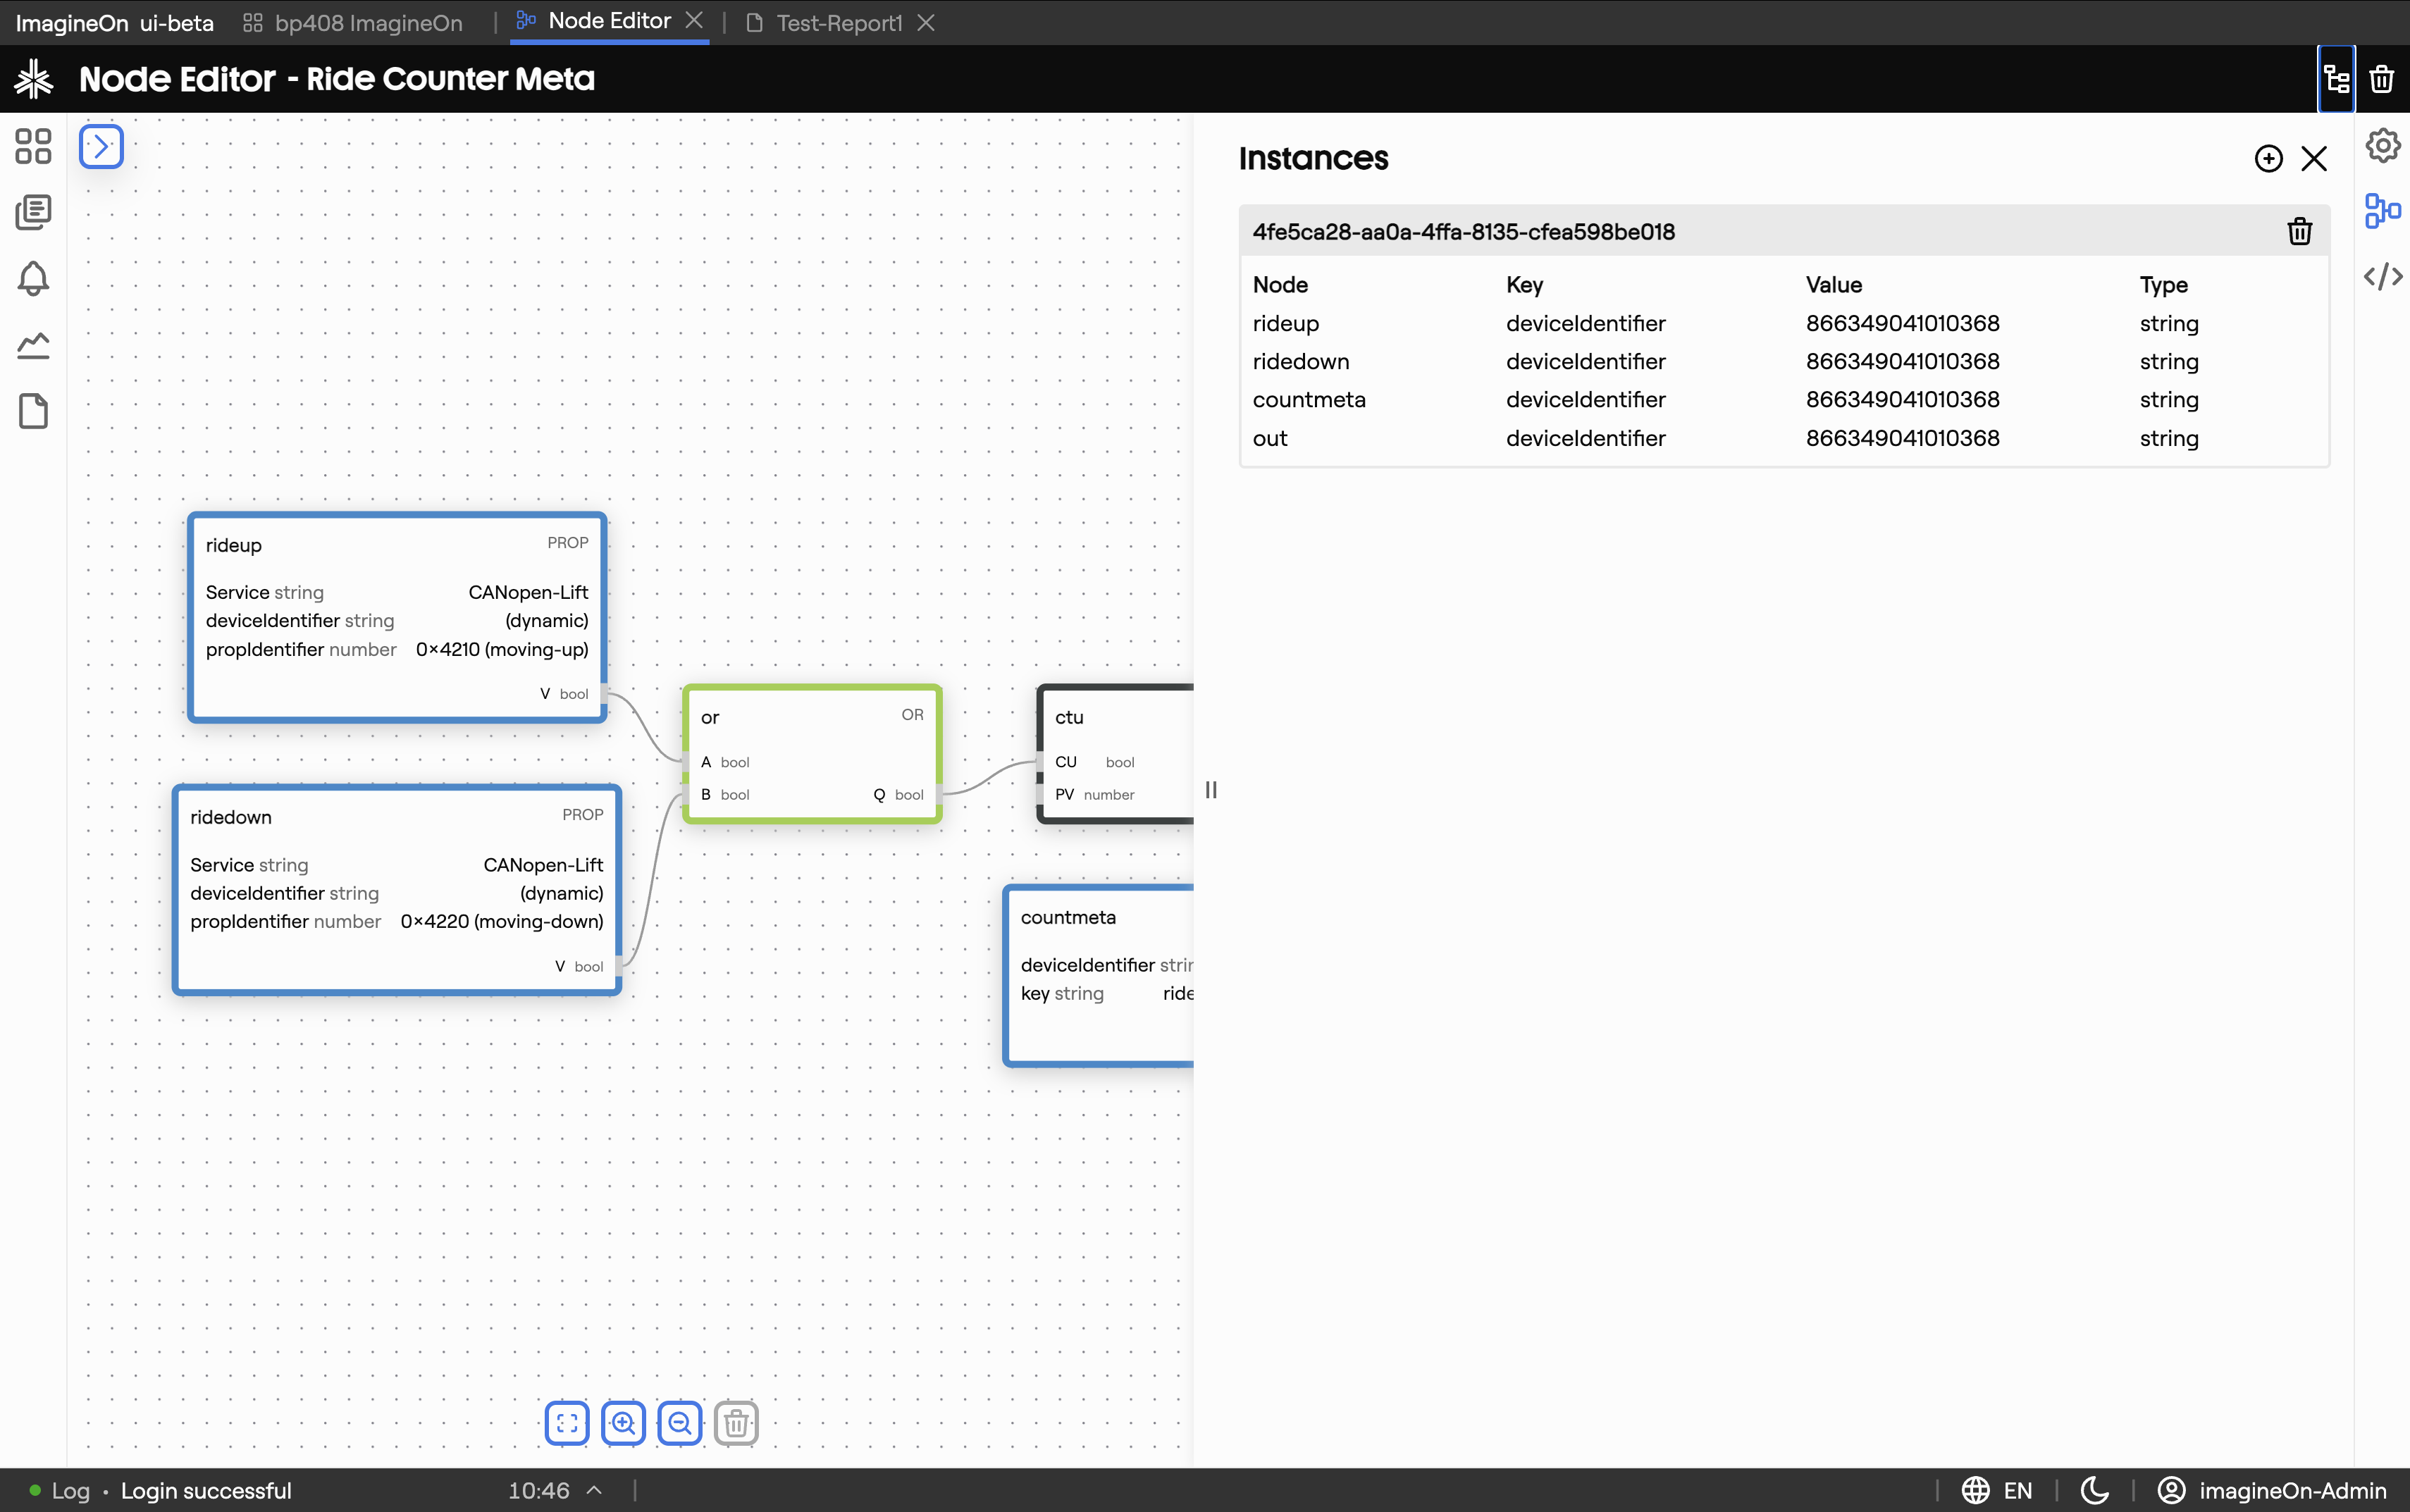
Use it to verify a fresh deployment is producing the values you expected, or to spot an instance stuck in an error state.
9. Drafts and publishing
The Node Editor uses a draft / publish workflow so you can experiment without affecting production:
- Save persists your current edits as a draft. Drafts don't affect running instances.
- Publish promotes the draft to active. Running instances pick up the new logic and existing data is reprocessed if your pipeline configuration calls for it.
The toolbar shows the current state (draft / published) and disables Publish while there are unsaved changes. Closing the page with unsaved edits triggers a confirmation prompt.
10. Deep links
Heads-up. These URL patterns are reliable when produced by Coldwave itself. Hand-constructed URLs from another user may not land where you expect — see URLs and tabs.
| URL | Effect |
|---|---|
/node-editor | Open the editor on the last pipeline you edited (or a blank canvas). |
/node-editor/<nodeConfigIdentifier> | Open a specific pipeline by its config identifier. |
11. Persistence — what is remembered
Per-user, persisted between sessions:
- Last-opened pipeline — driven by the URL.
- Inspector and instances-panel open / closed state.
- Canvas zoom and pan position — restored when re-opening the same pipeline.
The pipeline itself — nodes, connections, parameters and publish state — is stored on the backend and is the same for every user with admin access.